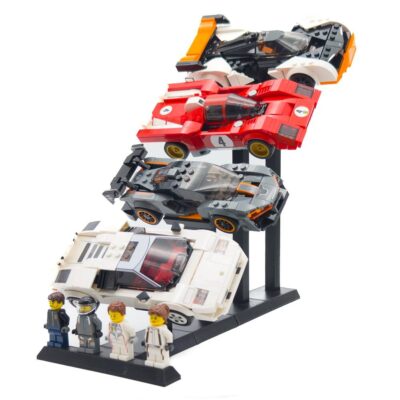
So you’ve bought a stand or are still considering buying one? You’ve come to the right place! This guide is prepared especially for you. Step by step, I’ll show you how to correctly mount your model on the stand so that it quickly finds its way to your shelf!

Get ready!
Check if you’ve received all the elements in the package:
- A base with spaces for figures
- A plate with a name or a personalized plate that you can order here
- An arm that provides elevation and tilt for the model
- The arm screw is usually slightly screwed into the lower mounting hole of the arm.
- A LEGO brick with a magnetic adapter
Is something missing? Report any missing parts here
You’ll also need a Phillips screwdriver for assembly, which you can find in the tool box in any home – recommended size is PH2.
Everything is there? Great, let’s move on. There are 6 steps waiting for you to completely change the look of LEGO in your home!
1. Nameplate
Customizing the set is an incredibly crucial element of any stand. A nameplate will provide a unique look. The text on the plate is created by 3D printing so it’s embossed.
Clip it into the base and press until you hear a click. Push it firmly into each of the 4 corners to ensure it doesn’t protrude anywhere.


2. Position the model arm
Unscrew the screw gently from the lower hole of the arm. Don’t lose it – we’ll need it in the next step.
The arm must be oriented with its thinner wall forward as shown in the picture.⚠️ Otherwise, the model may not be stable and fall off the stand, which no one would want!
3. Tighten the model arm
If the model arm is properly positioned, you can tighten it to the base with the screw. Do it in such a way that there is no looseness left.


4. Attach the block with the magnetic adapter
Turn the X-Wing model upside down so you can see the bottom of the fuselage. Find the center of gravity of the model and attach the block with the adapter as close as possible. Locating the center of gravity ensures proper positioning of the model.
5. Slide the block with the adapter into the arm
We’re almost done! Now slide the model into the arm until it’s caught by the magnet in its final position.


6. Position the figures
The spaces on the base provide the possibility to position the figures. The most important part is choosing your favorites, don’t rush ⌚️ – this process may take a while.
That’s it! Wasn’t it simple? If you have additional questions, leave them in the comment section under this post or contact us here
Final result ❤️️


Check out these stands!
-
 Dodatkowa półka do gablotki IKEA Detolf | Adaptery Montażowe17,00 zł – 69,00 zł
 -
 Podstawka do samochodów LEGO Speed Champions – Konfigurator70,00 zł
 -
 Podstawka do Lego Star Wars 75362 Ahsoka Tano’s T-6 Jedi Shuttle55,00 zł – 59,00 zł


![Read more about the article [Manual] Wall Mounting for Helmets Collection](https://stawiamklocki.pl/wp-content/uploads/2023/03/Helmets-Collection-4-768x768.jpg)
